If you already bought your website domain from another company, you can still use that domain for a website package that you purchase from us. In order to do use that domain, you'll need to update your DNS settings with the company you bought your domain from to point to our servers. While it sounds complicated, it's like telling the internet "My Company" is located at "123 Main St, Sometown, NY" so that it knows where to find your website.
There are two options to take care of this change:
Option 1: Ask your domain provider to do it for you!
Most domain providers will do the work for you if you contact customer support. If they won't do all the work for you they'll be able to give you good instructions. Copy and paste the request below.
I made a website using another company and need to point my domain to their servers. Can you set this up or walk me through the process of making these changes? I need to change my A-Records for both "www" and my root domain. That's one record for www.mydomain.com pointing to 199.34.228.59. And one record for mydomain.com also pointing to 199.34.228.59. Note that I want to keep using you as my domain registrar. I am not requesting a transfer and do not have new name servers to provide you.
Option 2: Do it Yourself
It's hard for us to provide do-it-yourself instructions as every company that sells domains has things set up differently. What we can tell you is that you need to set up.
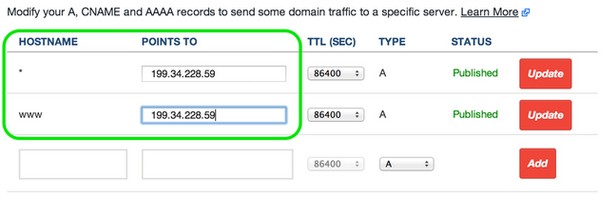
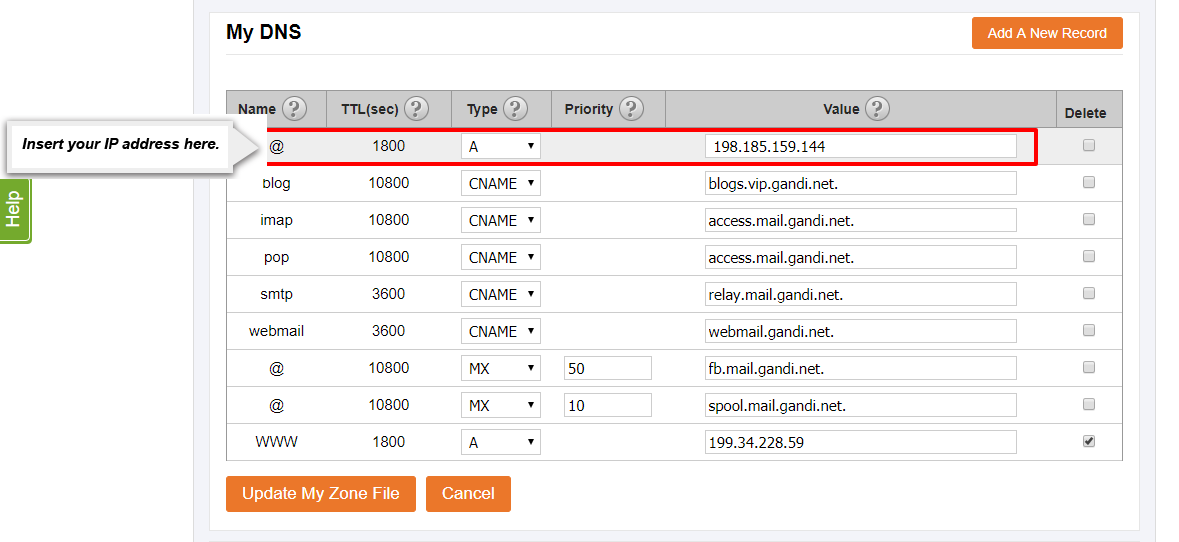
Right now you'll see something like this in your DNS settings:
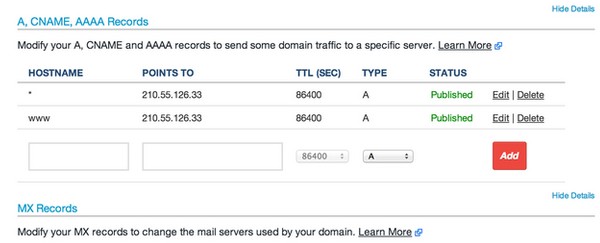
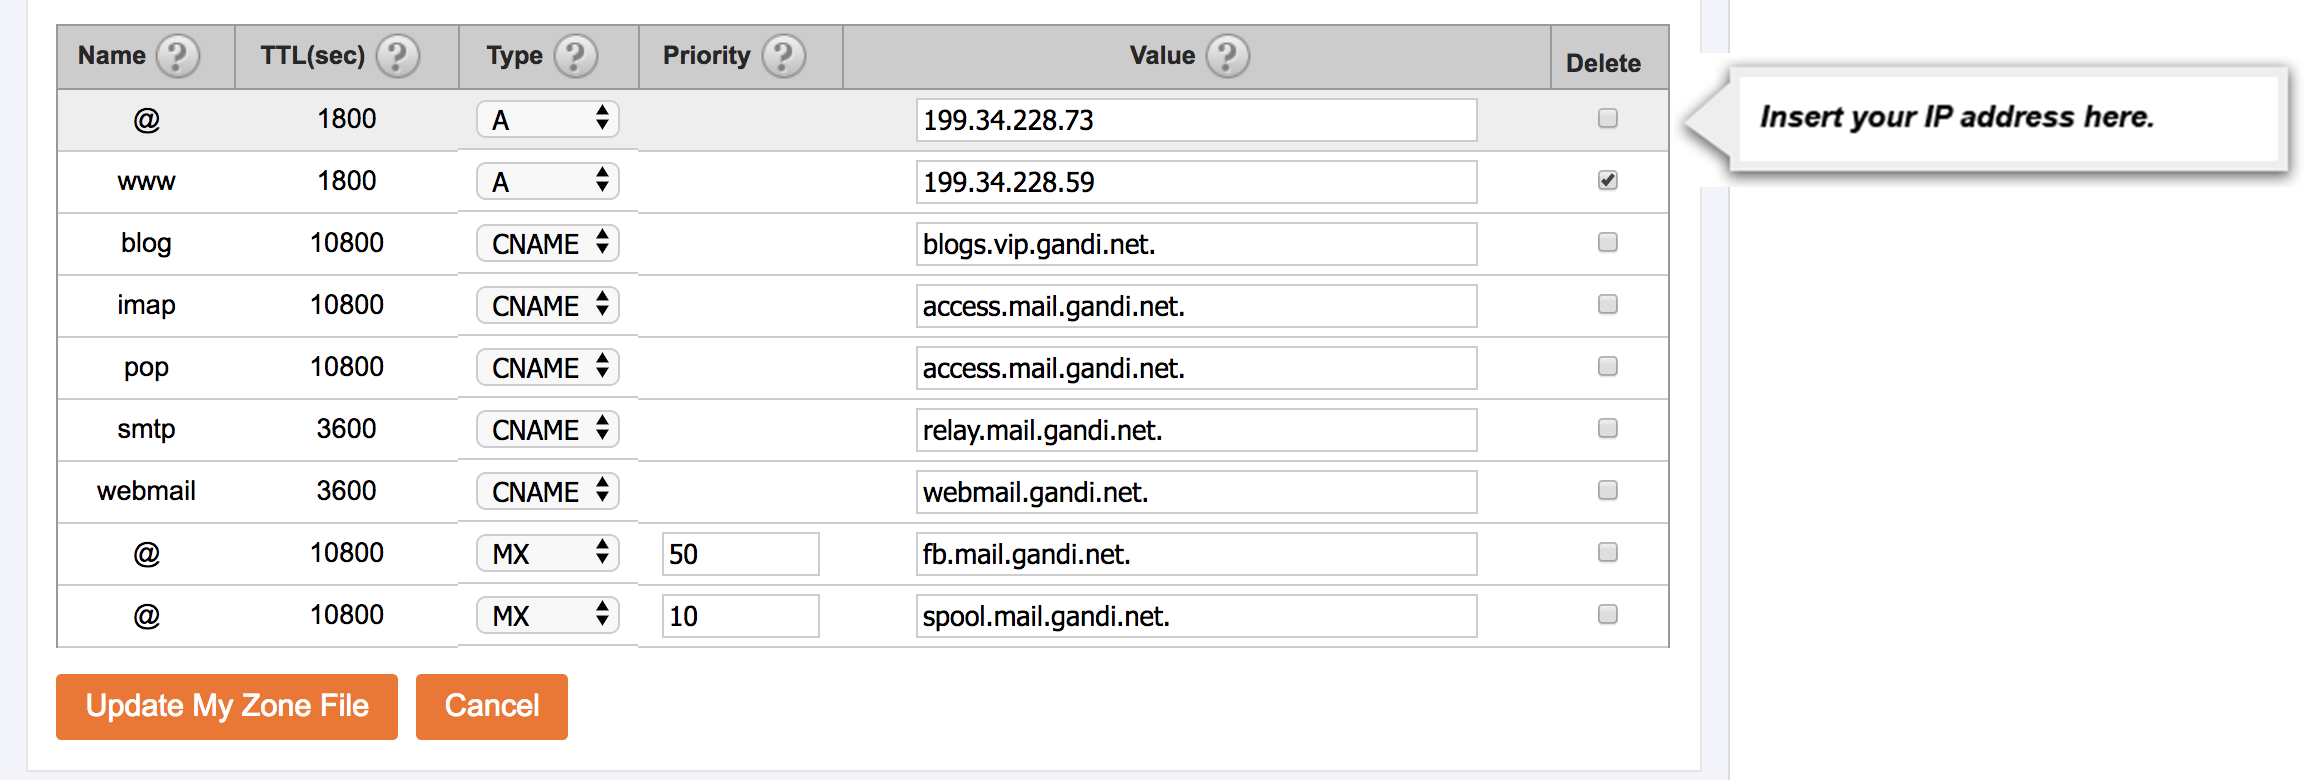
You need to edit both the * and www hostnames to point to 199.34.228.59. In some cases, you may not have a * hostname and instead have a @ hostname, if so you'll need to change the @ and www hostnames. You may also see hostnames of yourdomain.com and www.yourdomain.com, in this case, you'll need to update both of those. When done, you'll end up seeing something like this.


Connecting your domain name to a hosting server allows you to create and publish a website for the public to see. Hosting your website is essential for allowing public access to internet users and to be found on the world wide web. Connecting your domain allows you to keep your domain name subscription with a trusted domain provider while using the hosting services and website tools of another company, like Shopify.
To connect your domain to Shopify, please follow this step-by-step guide:
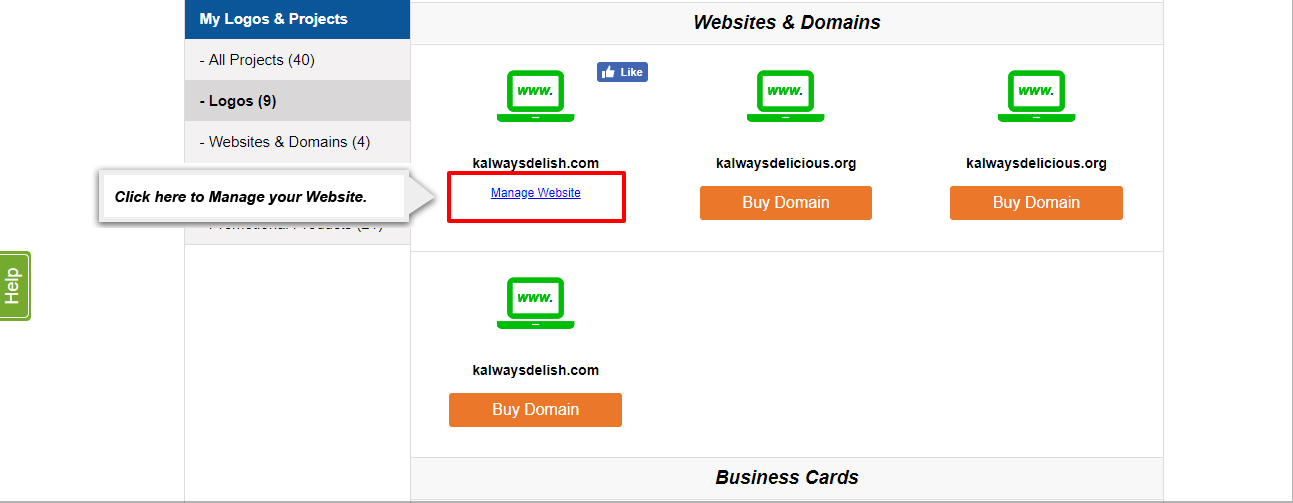
1. Sign into your account on our site.
2. Click “Manage Website” for the Domain Name you would like to alter
Opens a new window
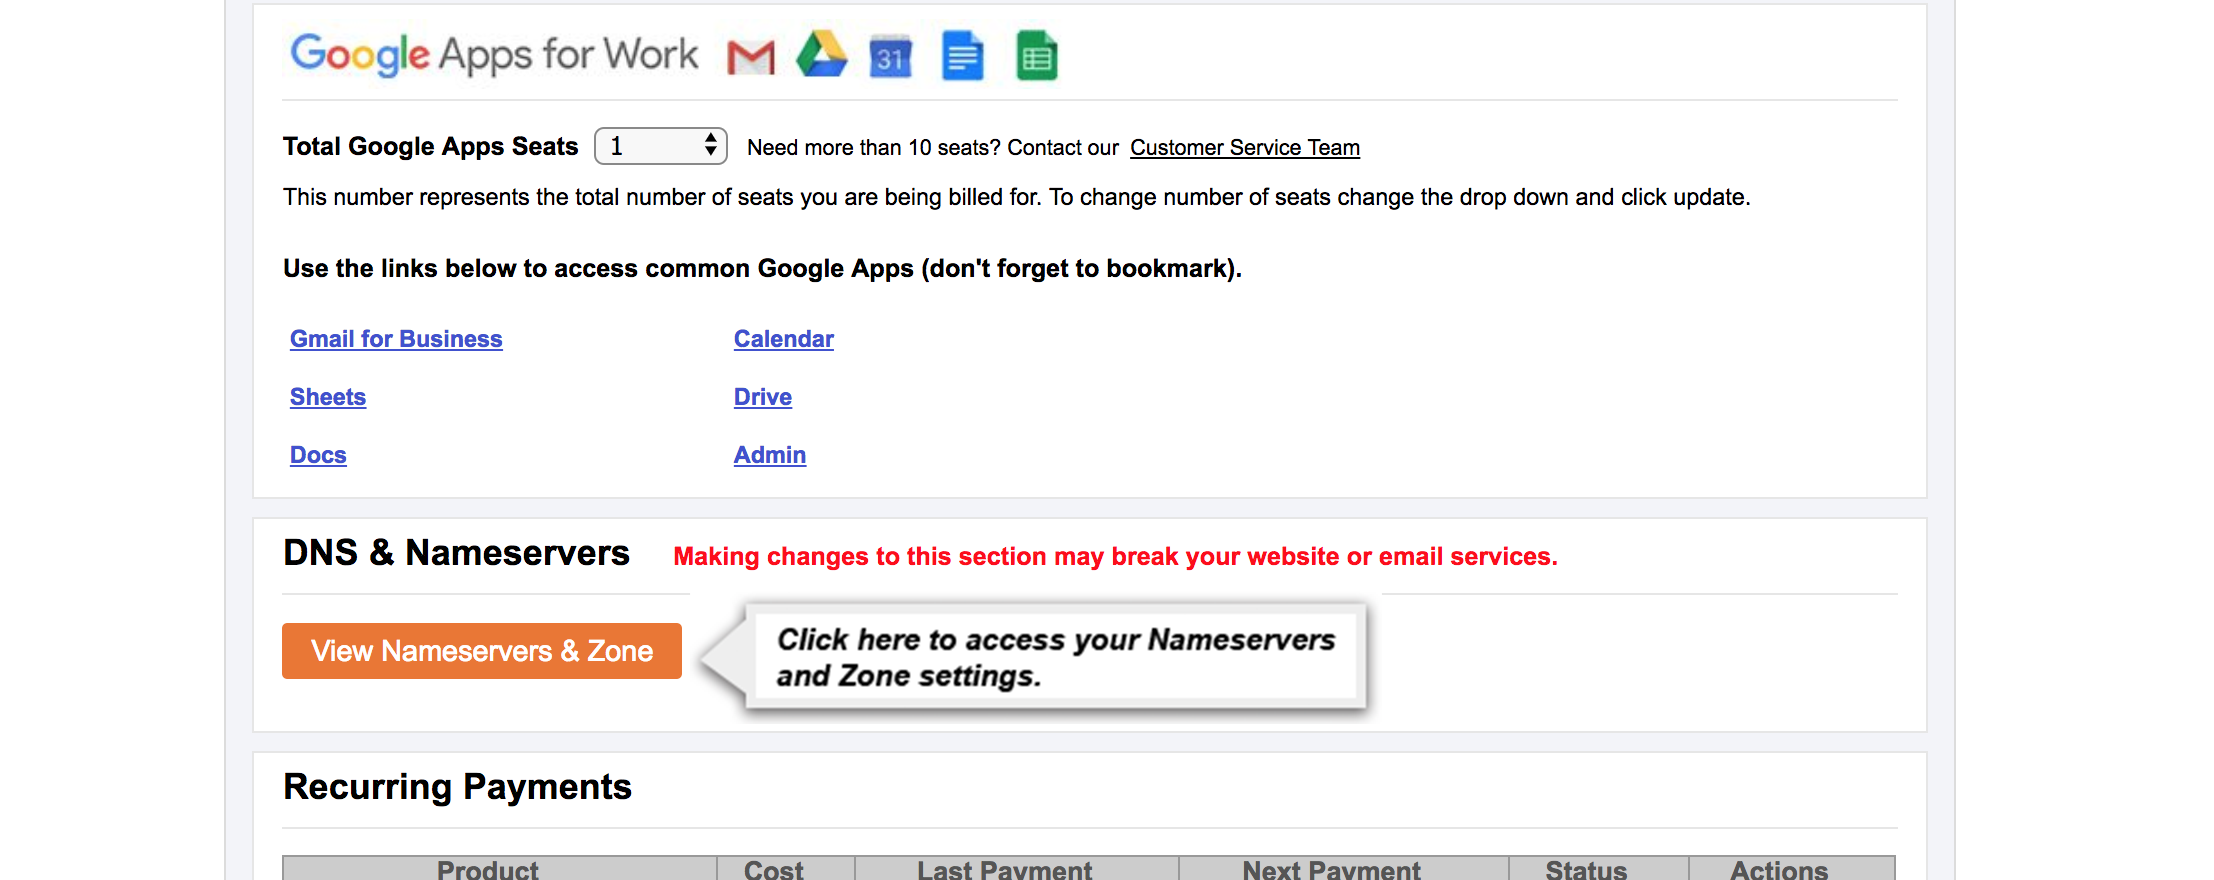
3. Click “View Nameservers & Zone” within the DNS & Nameservers Section.
Opens a new window
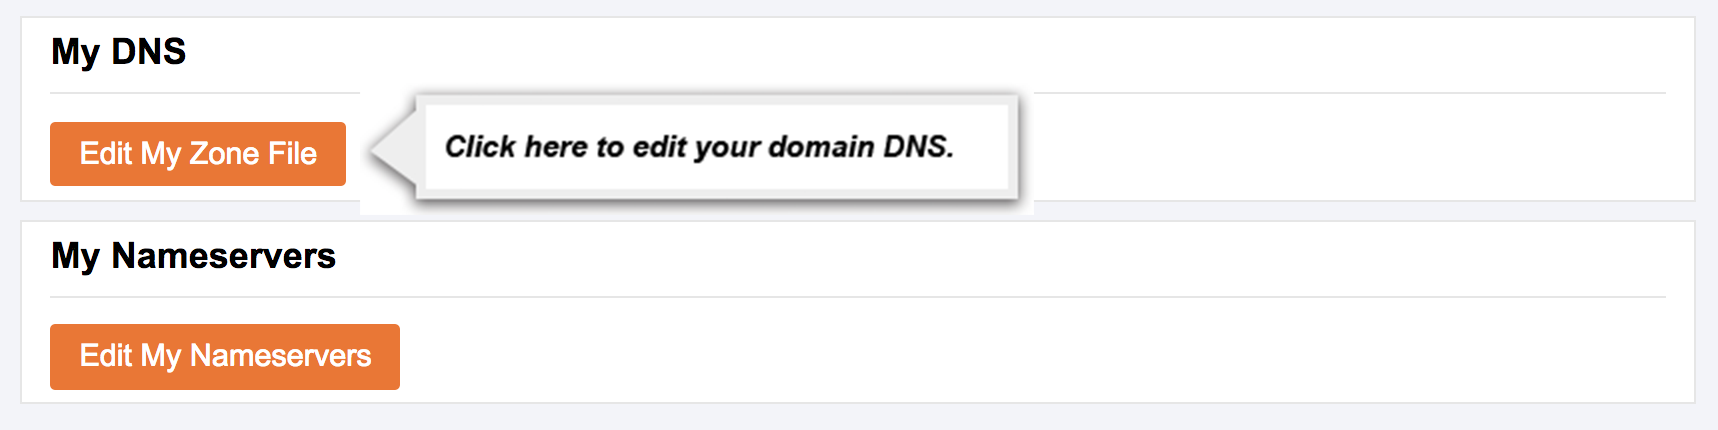
4. Click “Edit My Zone File”.
Opens a new window
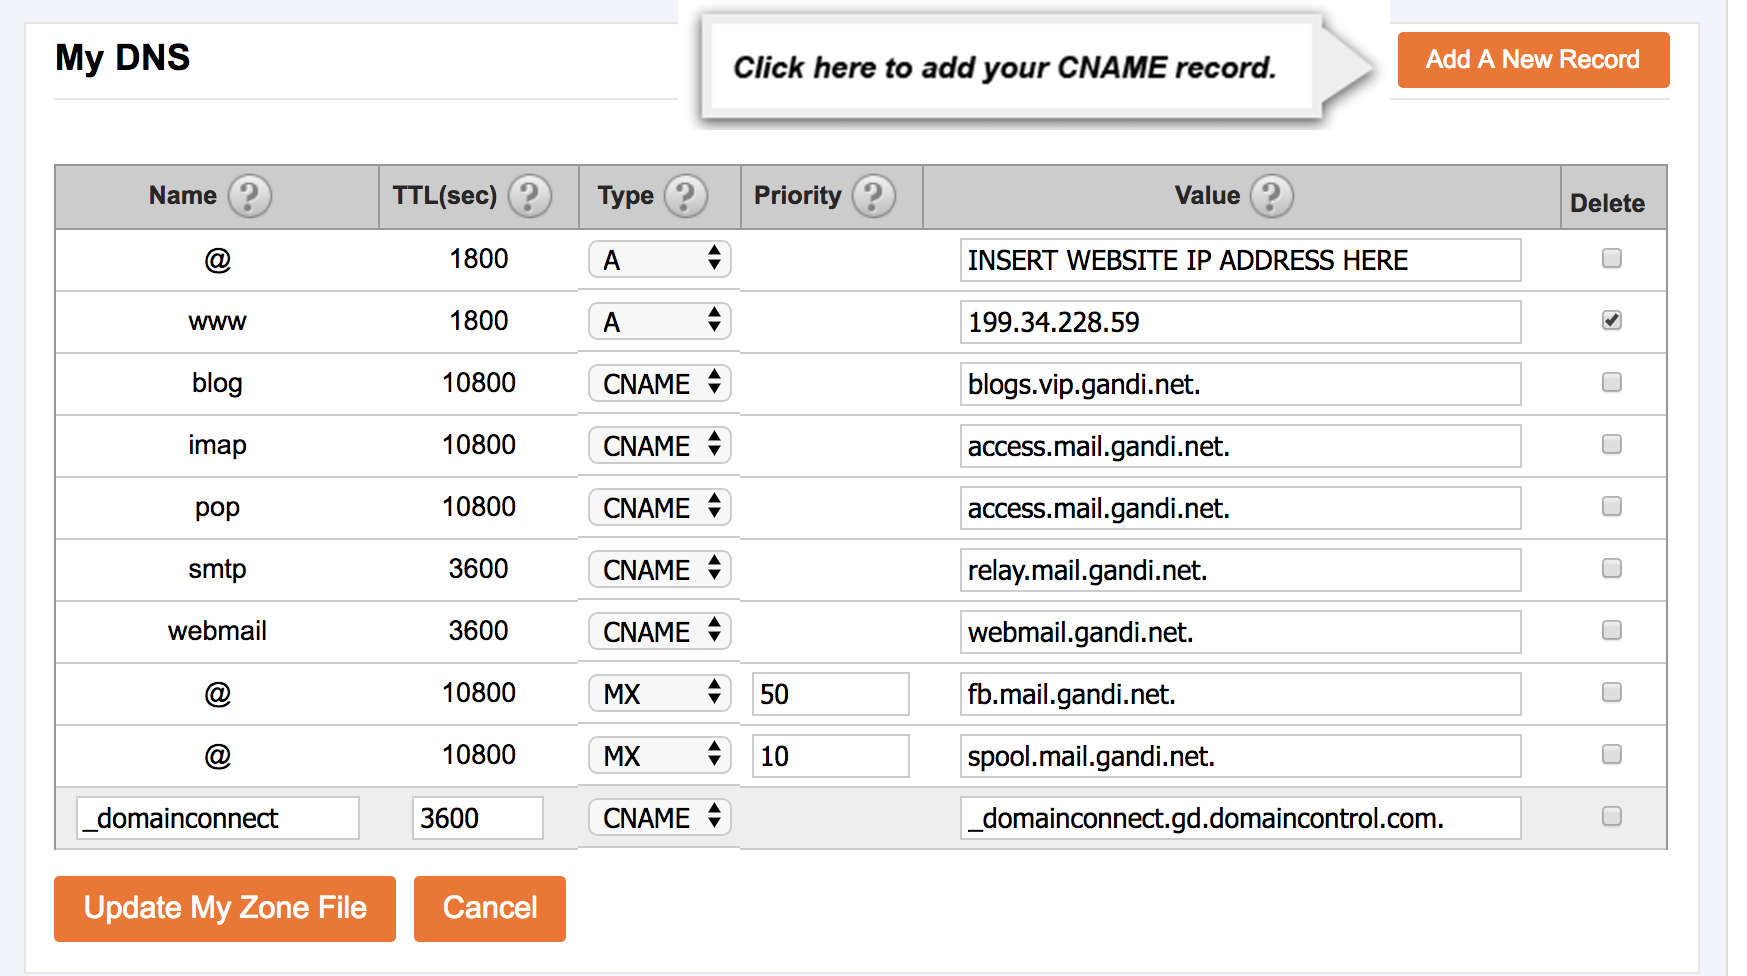
5. Click on the Delete checkbox next to the www A Record set to 199.34.228.59
Opens a new window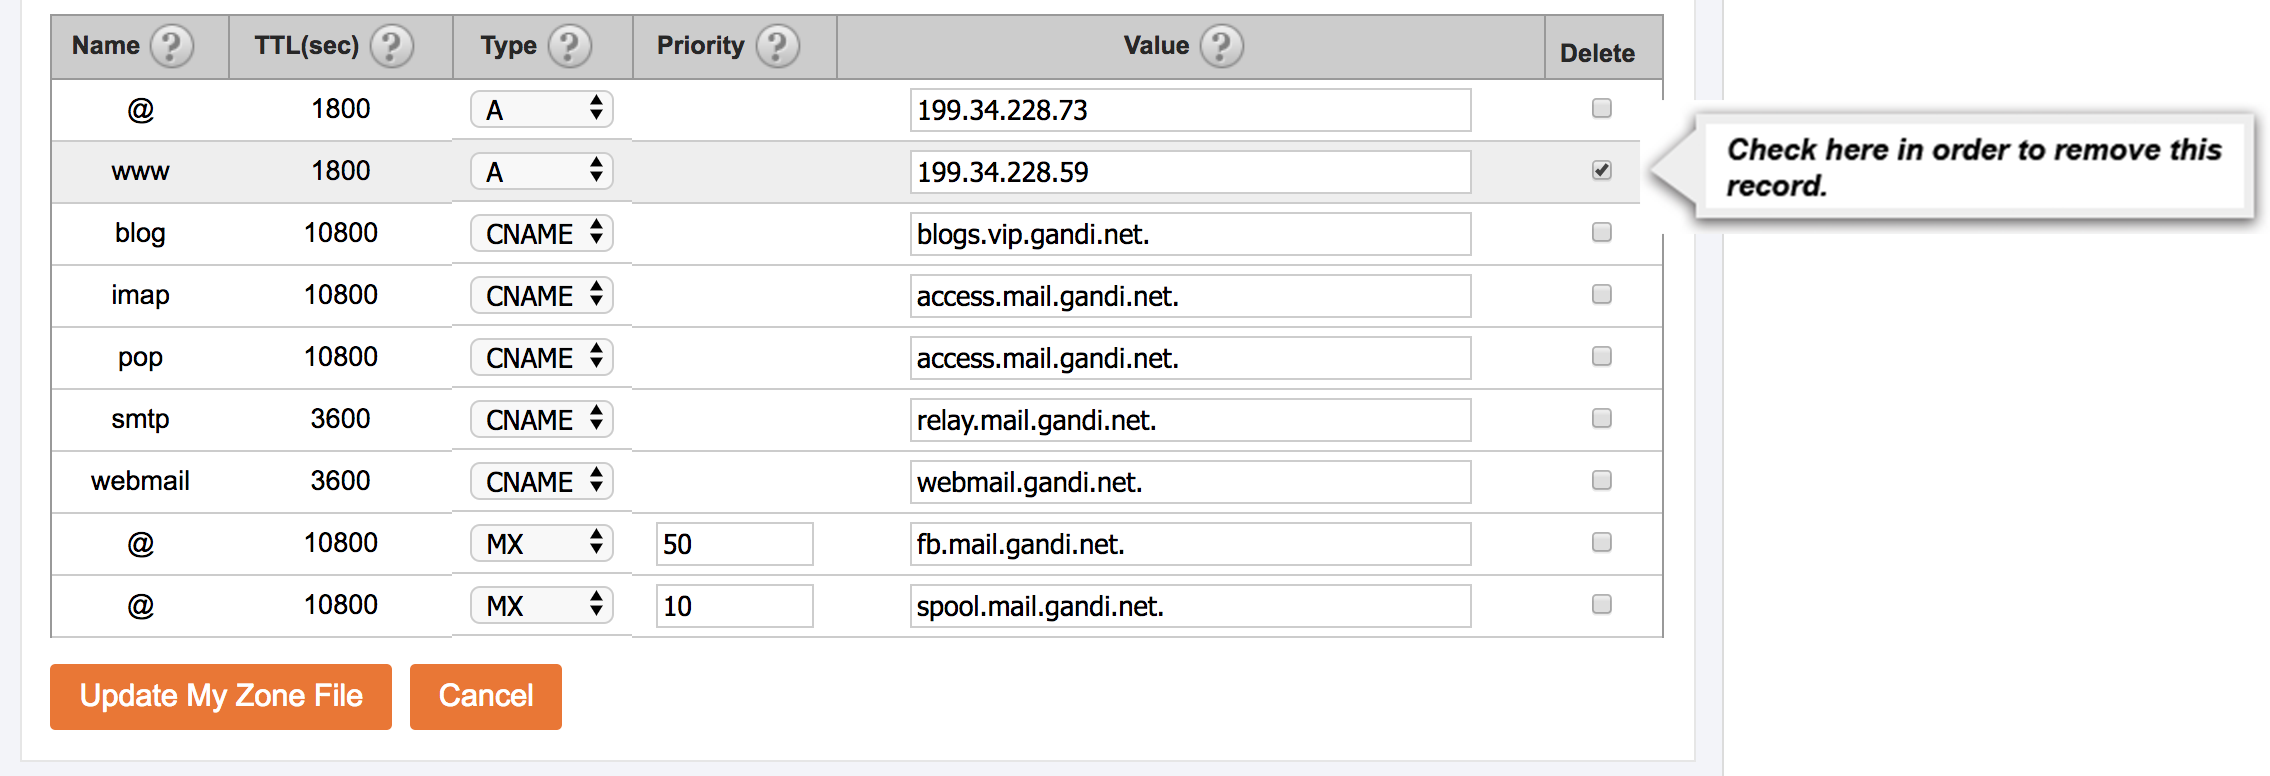
6. Change the value of the @ A Record to 23.227.38.32
Opens a new window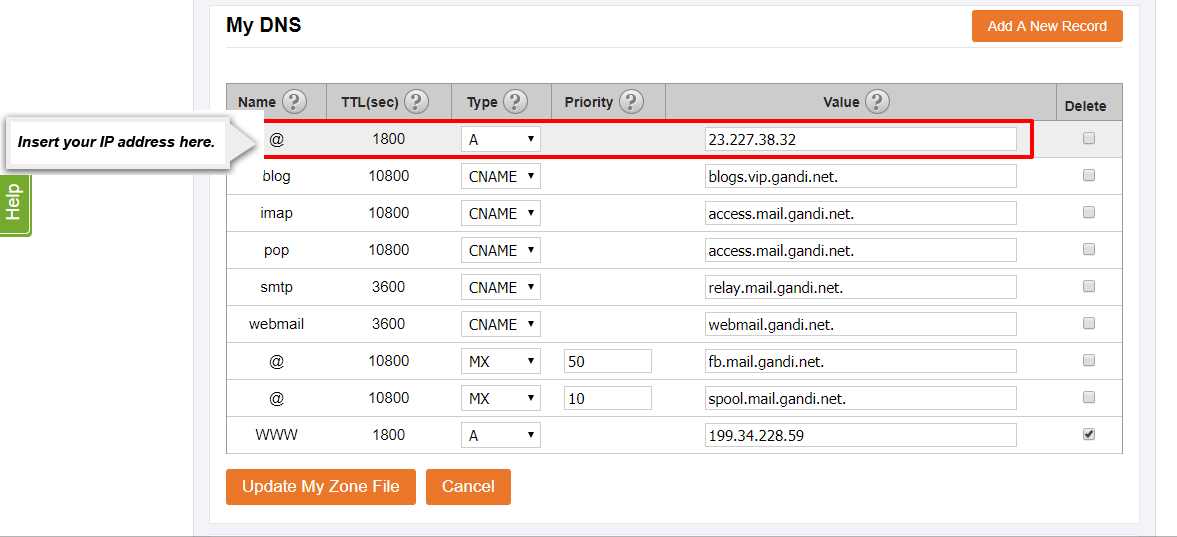
7. Click “Add A New Record”. Write the Name of this new record as www, set the TTL to 10800, and set the Type to CNAME. Then write the value as shops.myshopify.com.
Opens a new window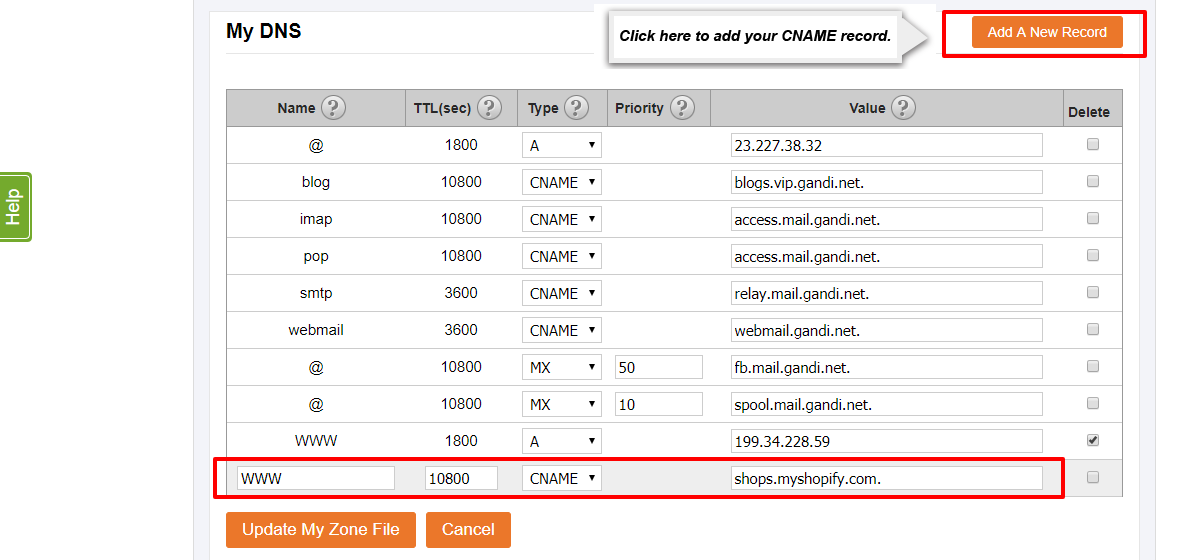
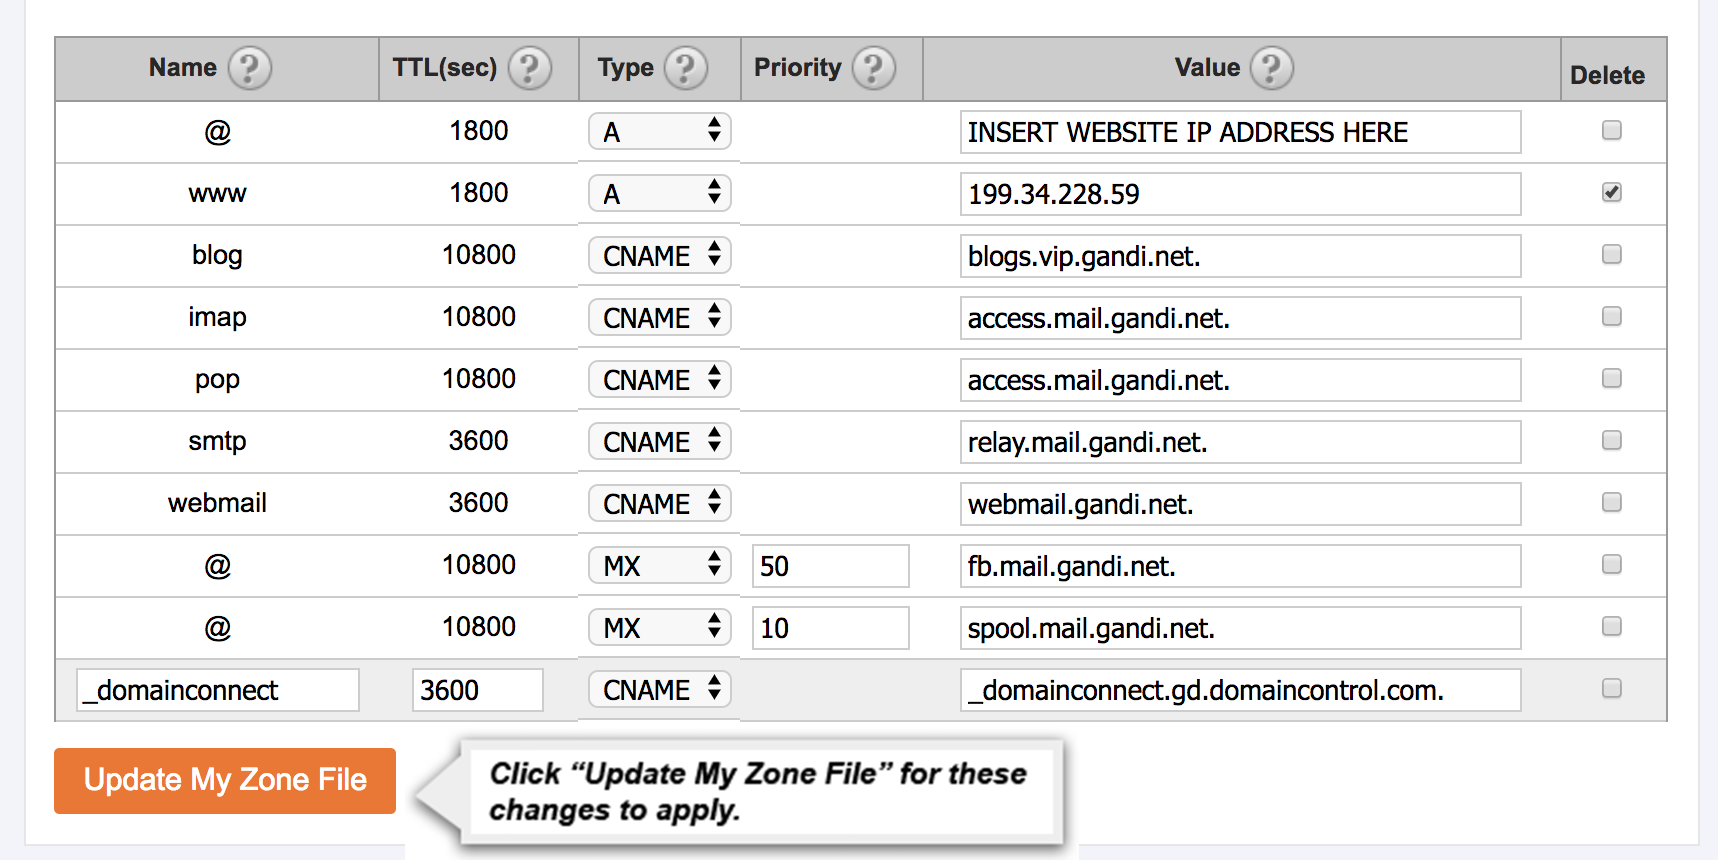
8. Click “Update My Zone File”.
Opens a new window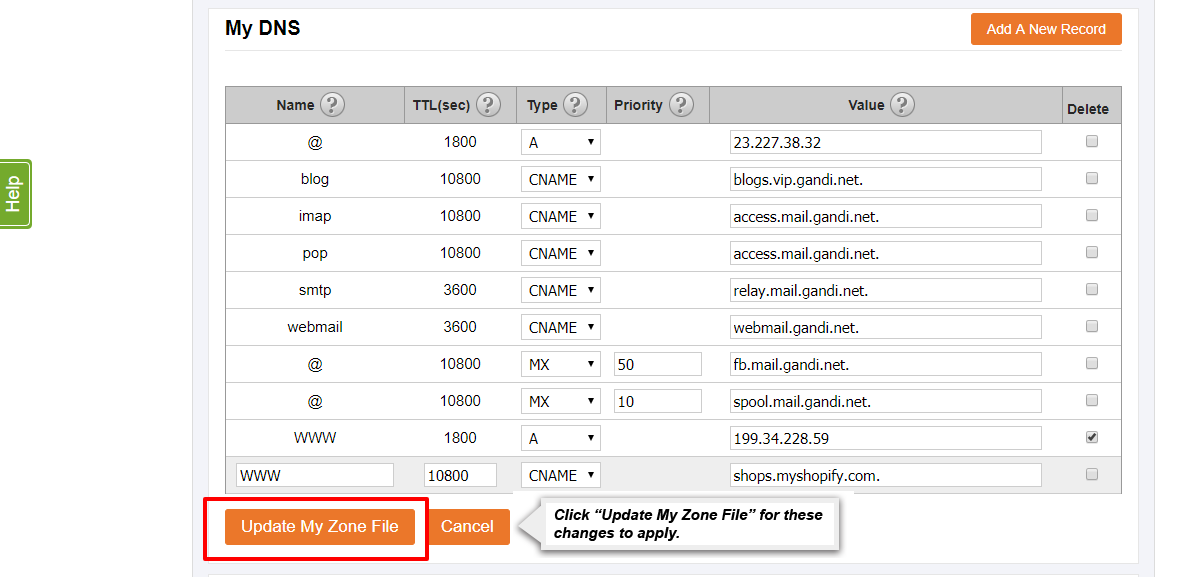
If you have any trouble connecting your domain to Shopify please contact customer service by using the "Submit A Request" in the top right corner.
 Opens a new window
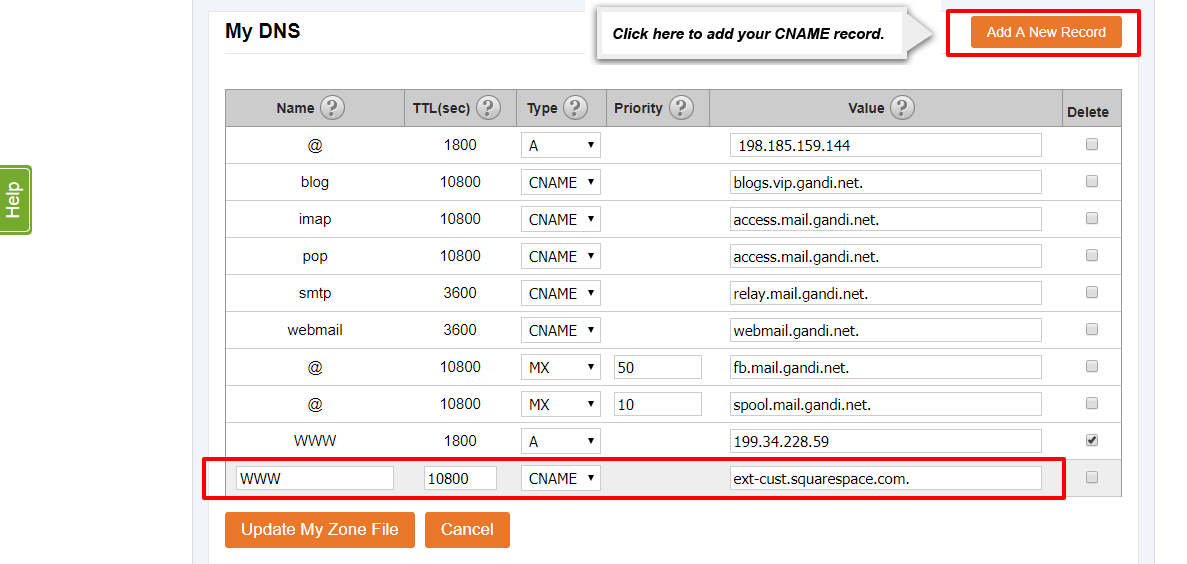 Opens a new window
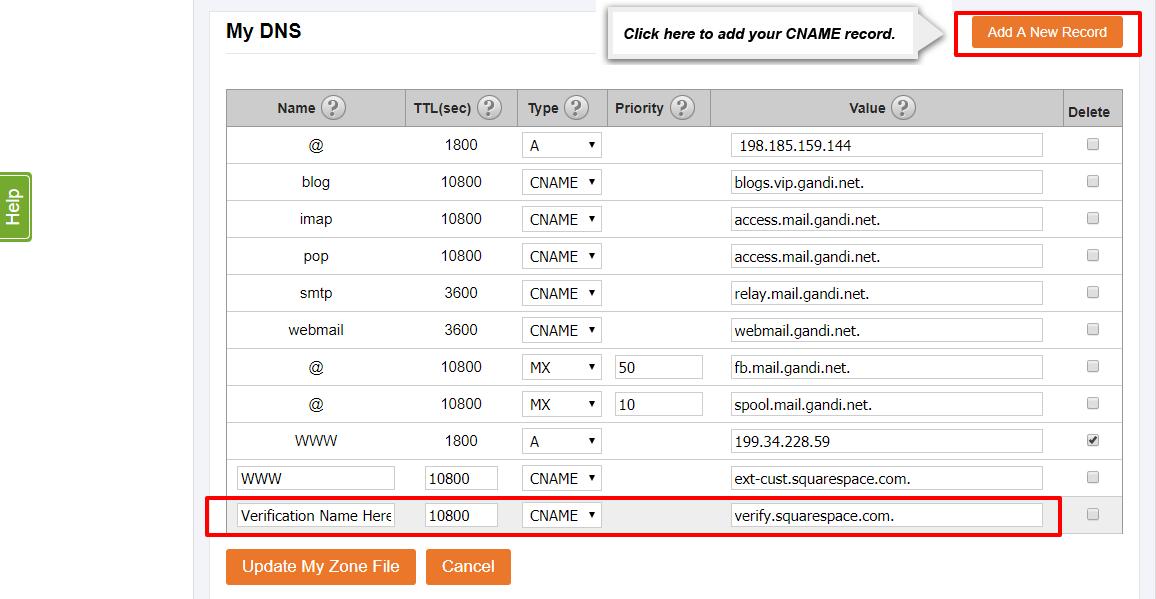 Opens a new window
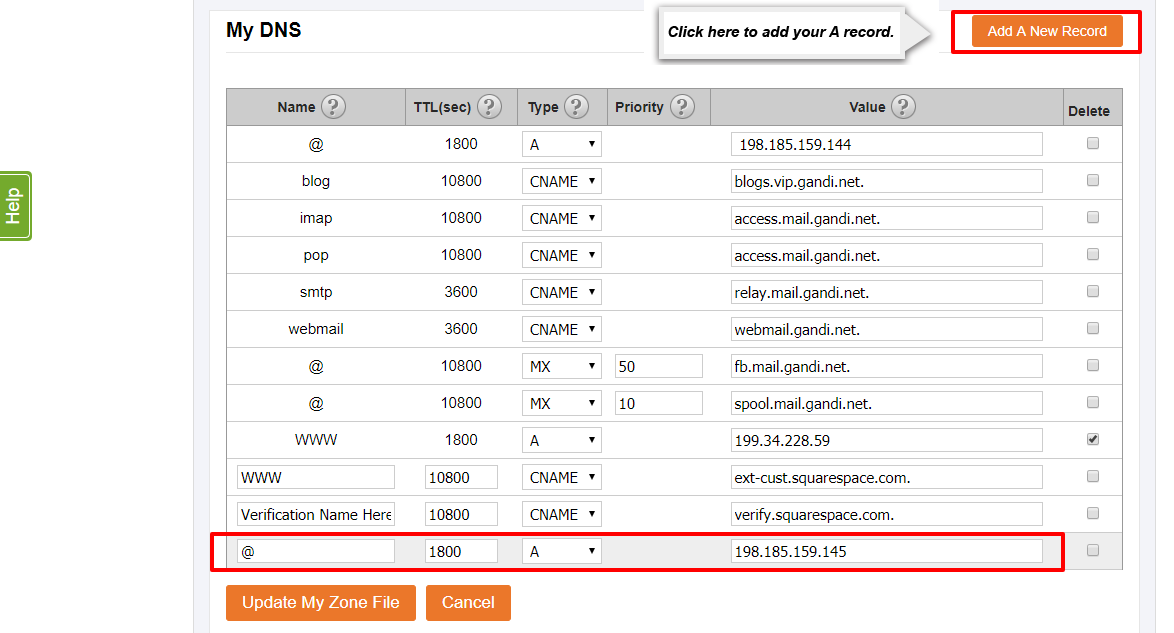 Opens a new window
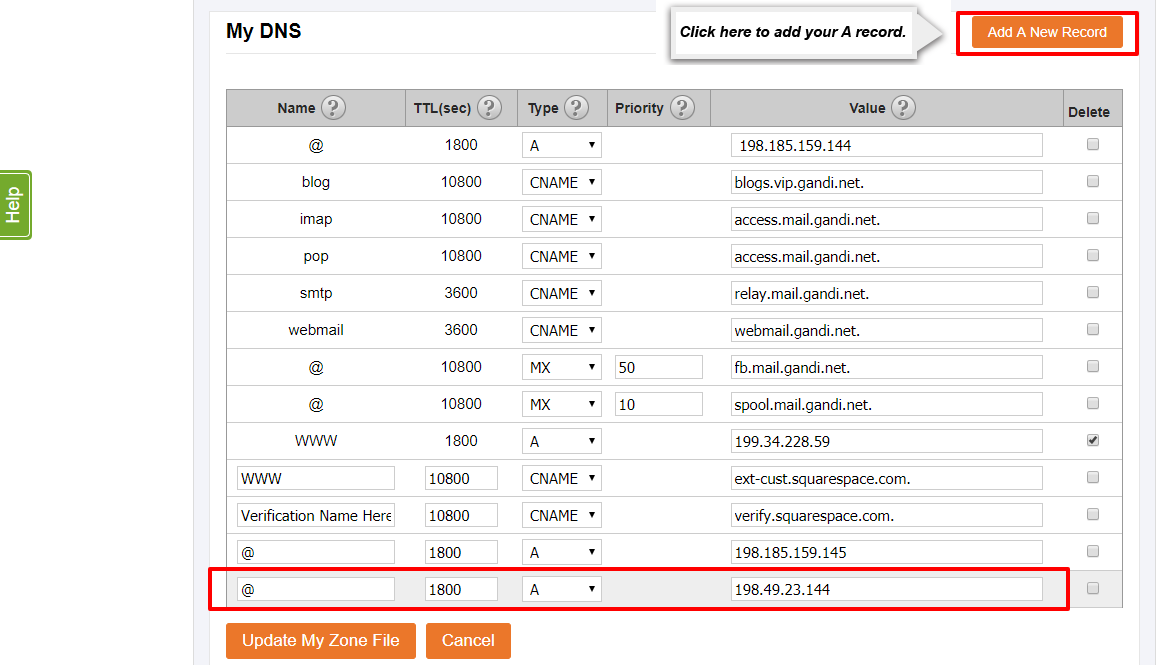 Opens a new window
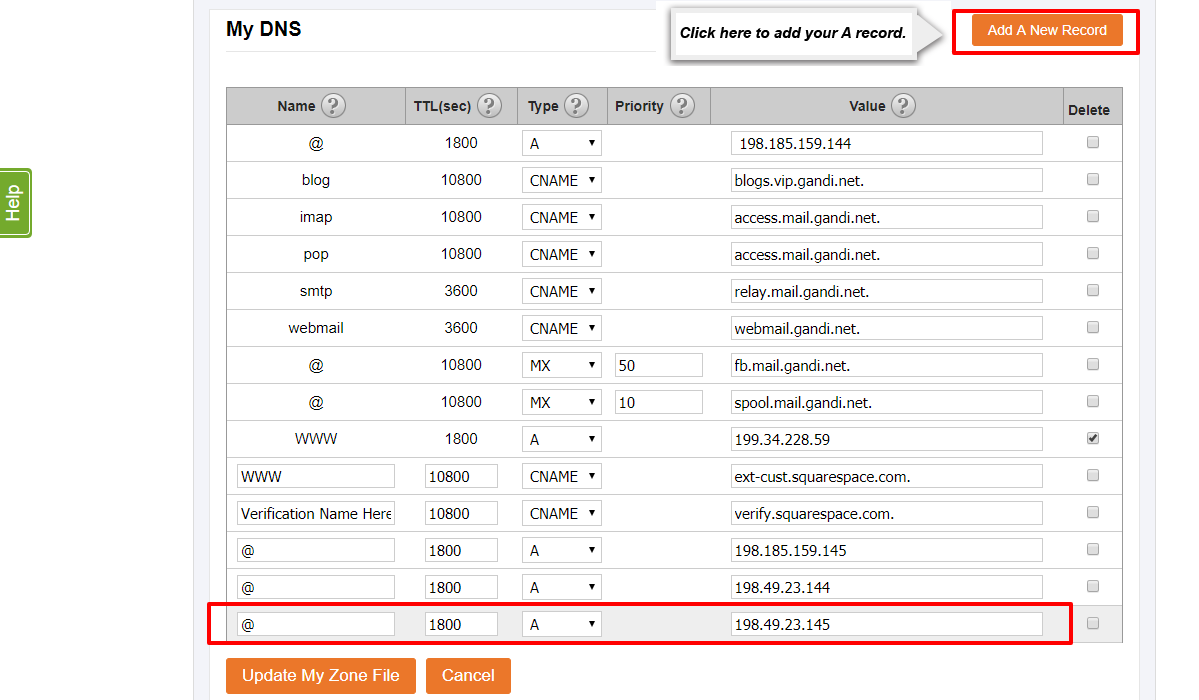 Opens a new window
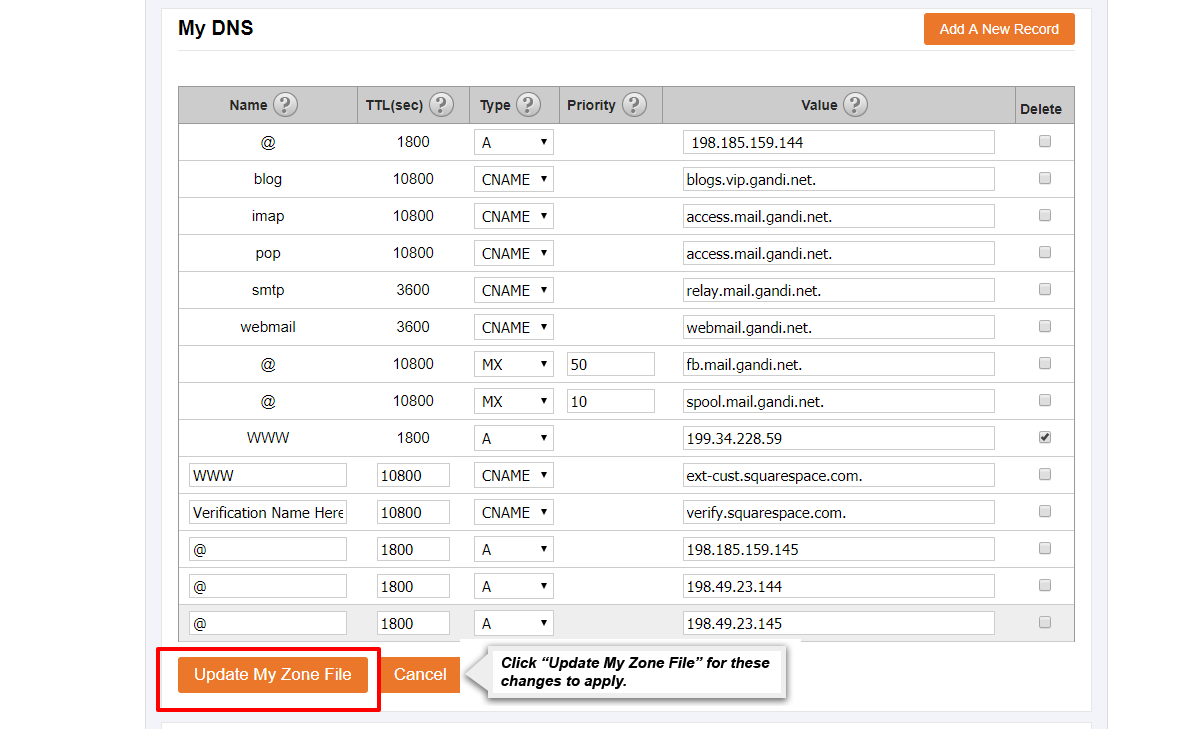 Opens a new window
Connecting Your Domain to Wix’s Hosting Server
Connecting your domain name to a hosting server allows you to create and publish a website for the public to see. Hosting your website is essential for allowing public access to internet users and to be found on the world wide web. Connecting your domain allows you to keep your domain name subscription with a trusted domain provider while using the hosting services and website tools of another company, like Wix.
Before you can connect your domain to Wix please make sure you have the following:
To connect your domain to Wix, please follow this step-by-step guide:
1. Sign into your account on our site.
2. Click “Manage Website” for the Domain Name you would like to alter.
Opens a new window
3. Click “View Nameservers & Zone” within the DNS & Nameservers Section.
Opens a new window
4. Click “Edit My Zone File”.
Opens a new window
5. Find your Wix Name Server Records here.
6. Copy your Wix A Record and replace the 199.34.228.59 value of the A Record at the top of your DNS Settings.
Opens a new window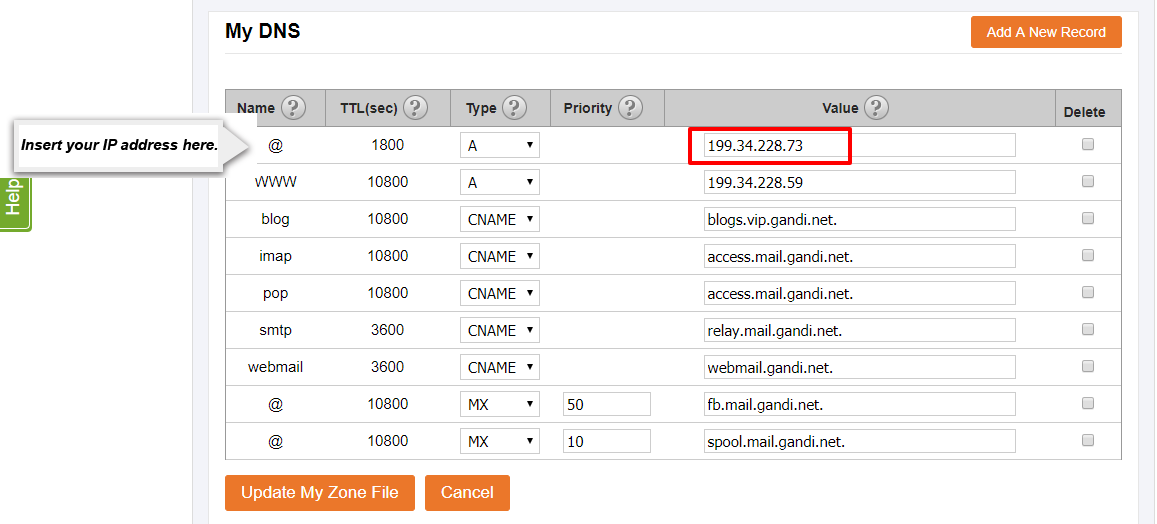
7. Click “Add A New Record”, then copy the CNAME Record from Wix and paste it into the value input on the new Record row. Make sure the name of this new record is www, the TTL is set to 10800, and the Type is set to CNAME.
Opens a new window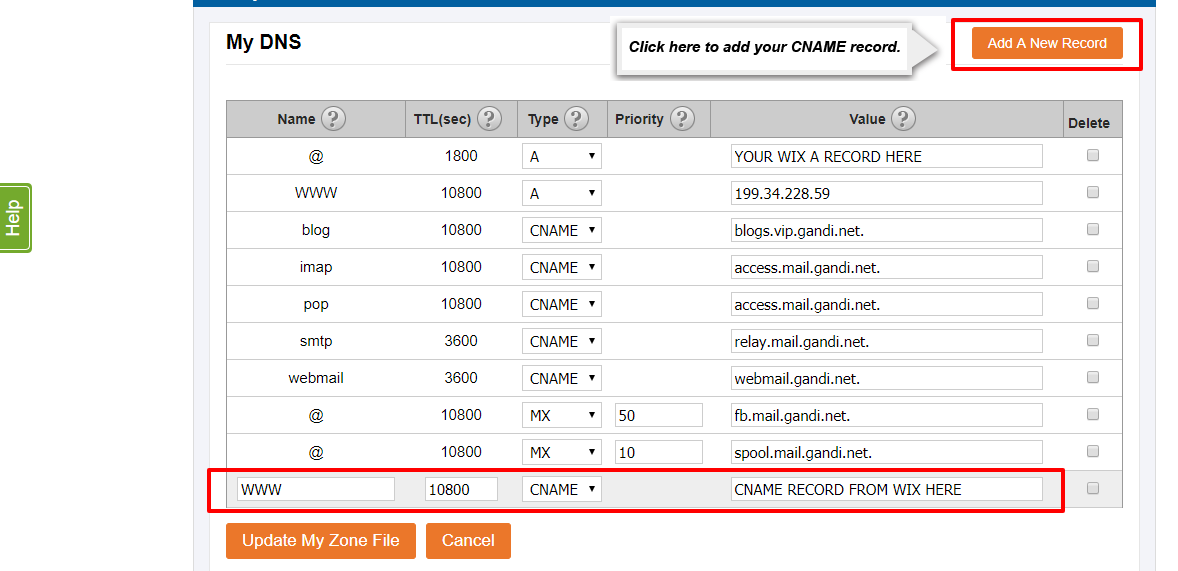
8. Click “Add A New Record”, then copy the CNAME Record from Wix and paste it into the value input on the new Record row. Make sure the name of this new record is M, the TTL is set to 10800, and the Type is set to CNAME.
Opens a new window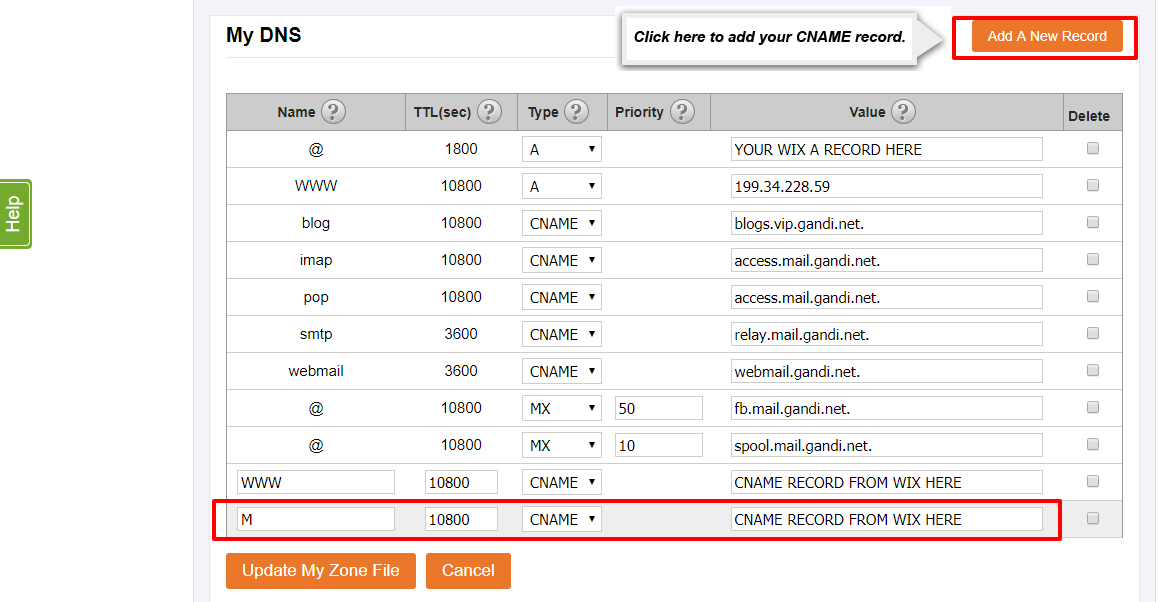
9. Click on the Delete checkbox next to the A Record still set to 199.34.228.59
Opens a new window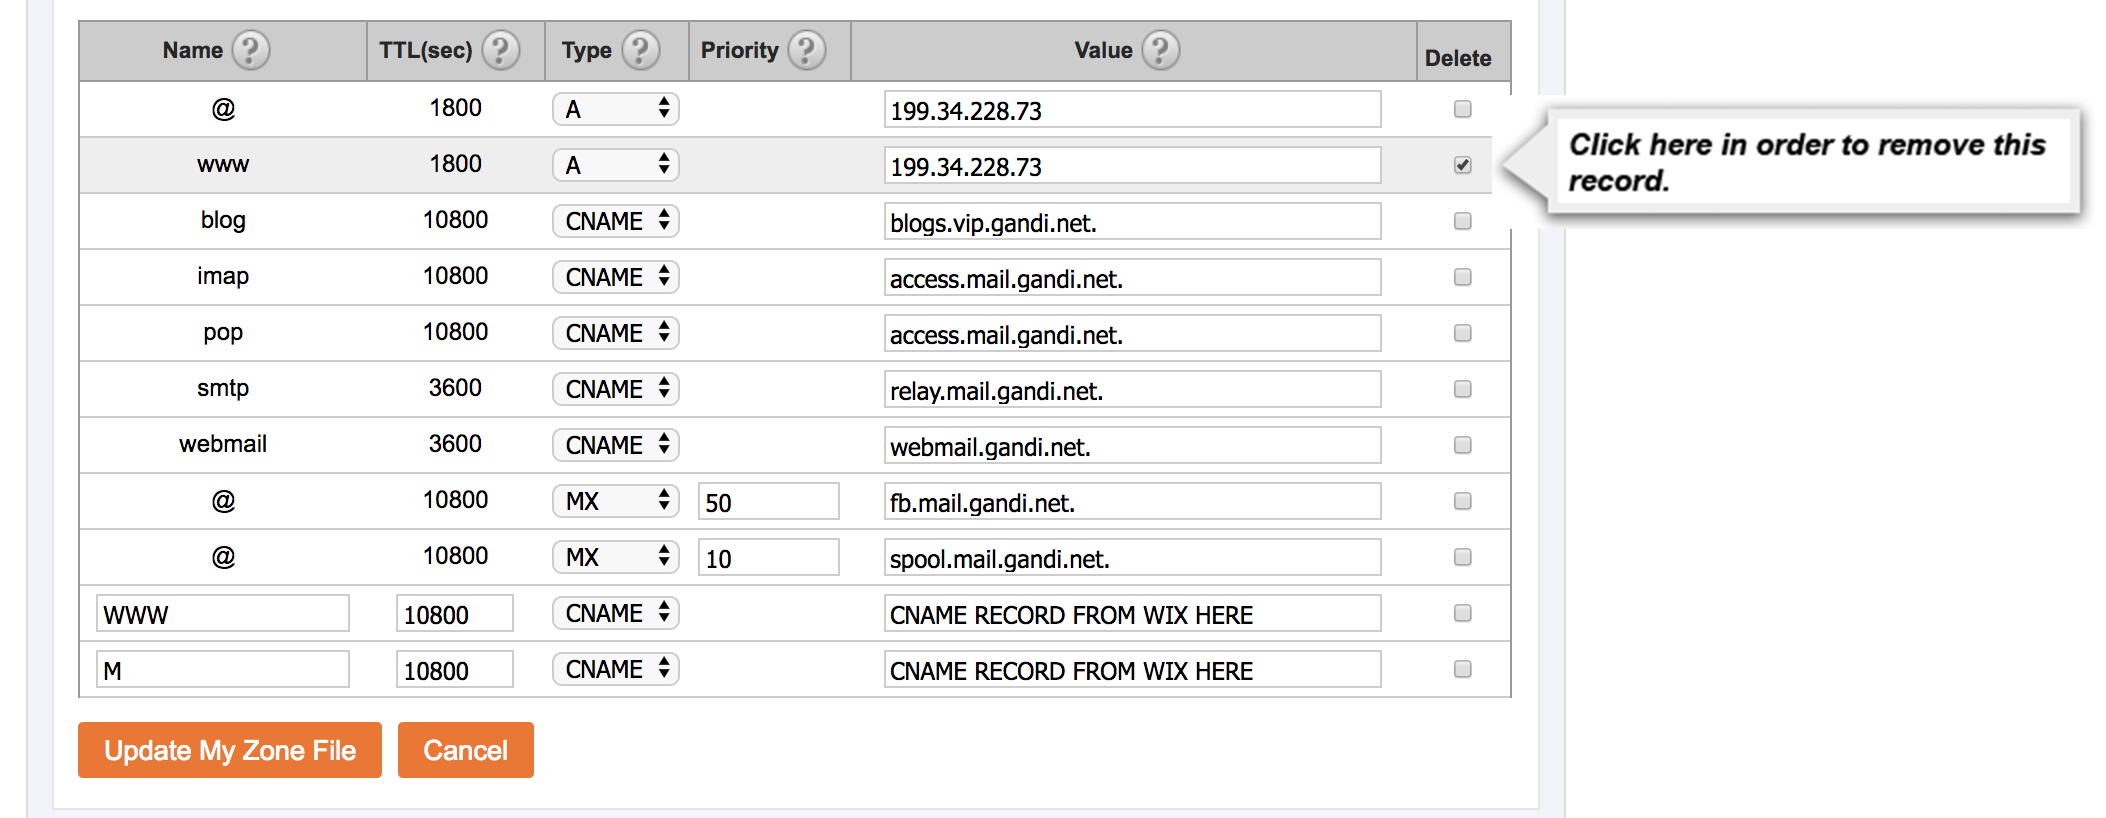
10. Click “Update My Zone File".
Opens a new window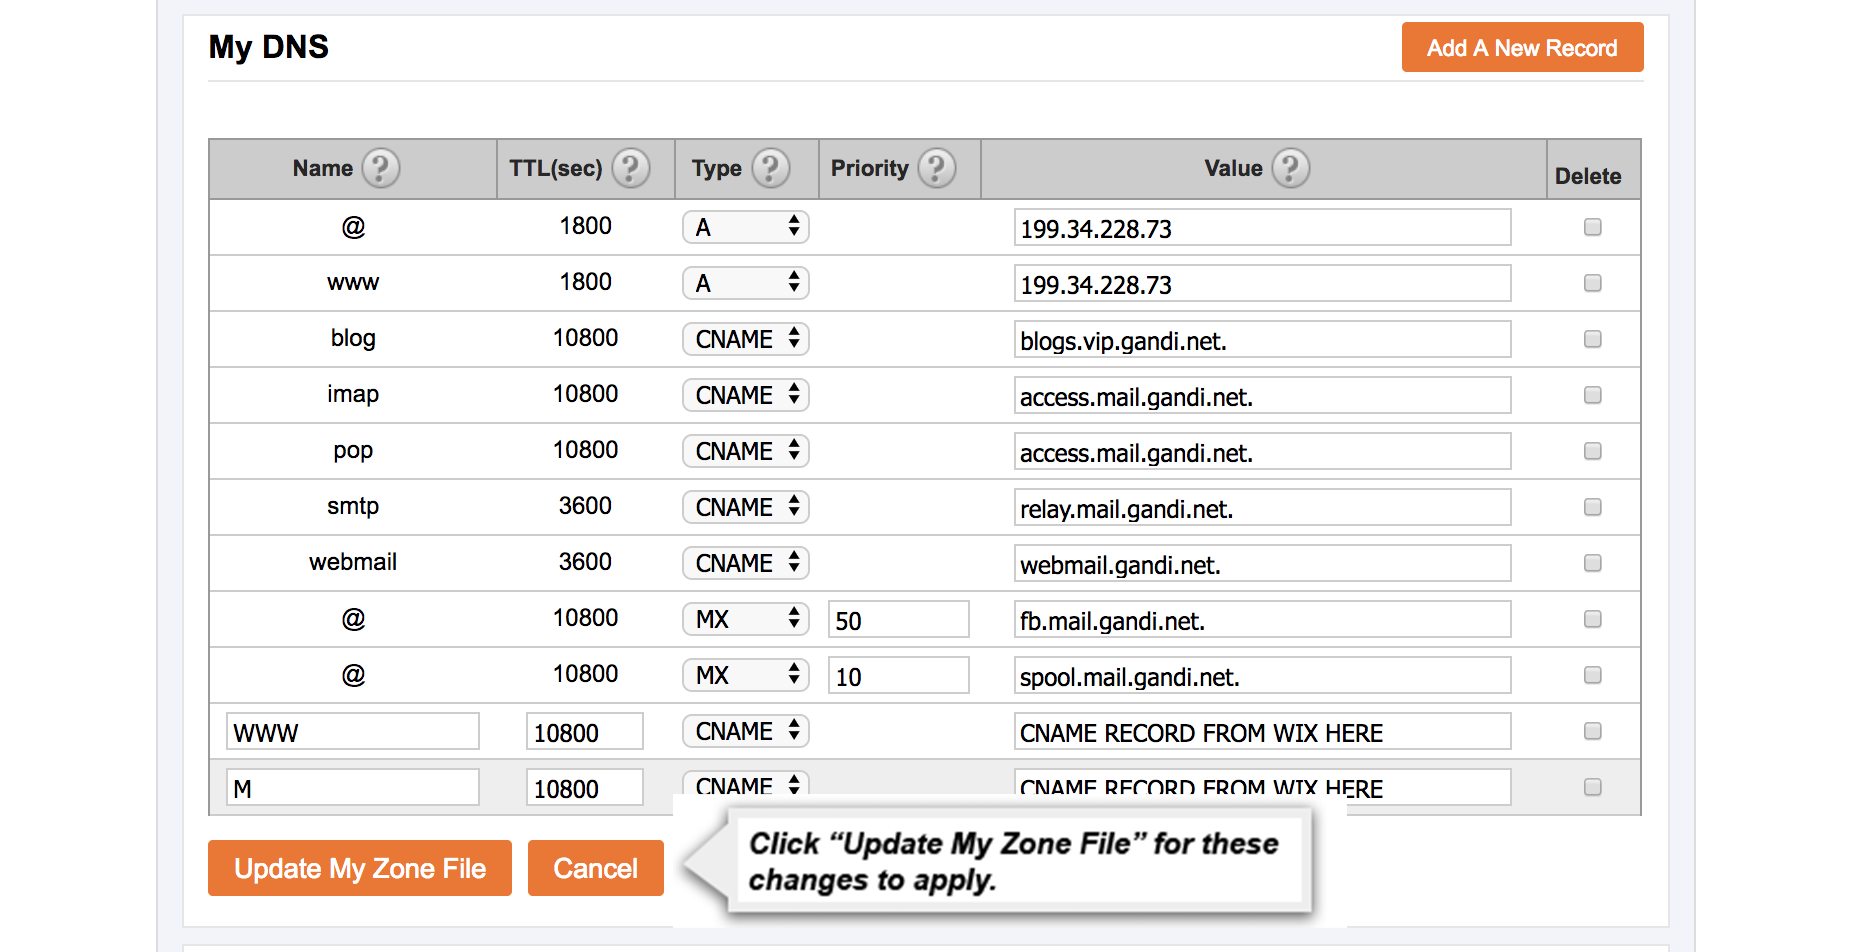
If you have any trouble connecting your domain to Wix please contact customer service by using the "Submit A Request" in the top right corner.
No worries, we are always here to help! We do advise you to check the spelling of your domain before completing your purchase. As we understand sometimes mistakes happen, if you have completed your registration for your Domain and additional subscriptions with us using a domain that is misspelled or incorrect you may choose to cancel the domain before the yearly registration is up.
Before doing so we do suggest checking the corrected Domain is available for registration. If so please proceed with purchasing the corrected subscriptions.
If you need assistance in transferring or exporting your content from the old site to the new site, need to cancel the misspelled domain subscriptions or if you have further questions please reach out to customer service directly.